The world of mycology is expansive, with enthusiasts and experts alike continuously experimenting to derive optimal results. This particular substrate recipe was developed with the intention of creating something both simple and effective. To everyone’s surprise, not only was it straightforward, but it outperformed many others in various parameters.
INTRODUCTION:
Welcome to this Living Page, a dynamic space continuously updated with the most accurate and up-to-date information. Below, you’ll find a list of materials essential for the Egg TEK. A handy quick-reference chart awaits, breaking down each ingredient for ease and efficiency.
RECIPE YIELD:
The following measurements will yield a 500ml solution.
MATERIALS NEEDED:
- 3x Whole Eggs (including shells)
- 1x Tablespoon Malt
- 1x Tablespoon Yeast
- Water
- 35g of Rice
- Pressure cooker
- Quart-sized mason jars with lids
- Aluminum foil
Egg TEK Quick Reference Chart:
| INGREDIENTS: | Quantity: | Notes: |
| Whole Eggs (with shell) | 3x Whole Eggs | Ensure shells are finely blended. |
| Malt | 1 tablespoon (tbs) | |
| Yeast | 1 tablespoon (tbs) | |
| Water | To make 500ml | Add after dry ingredients are blended. |
| Rice | 35g per quart jar | |
| Egg Solution | 50-60ml per quart jar | Exclude foam from measurement. |
Pressure Cooking | Settings |
|---|---|
| Time | 60-Minutes |
| Pressure | 15 PSI |
| Cooling | Allow to cool naturally to room temp before use |
PROCEDURE:
Blending the Eggs:
- Start by cracking all 3x whole eggs into a blender. Ensure you include the shells as they are a rich source of minerals that can benefit the fungi.
- Blend the eggs on medium speed until the shells are finely crushed and the mixture appears homogenized. This ensures that there are no large shell fragments that could potentially hinder the growth of the fungi.
Addition of Malt and Yeast:
- With the blender off, sprinkle in the malt and yeast to the blended eggs. These ingredients serve as nutrient boosters, helping in the accelerated growth of the fungi.
- Pulse the blender a few times to combine the ingredients gently. This prevents the formation of any large clumps and ensures even distribution.
Incorporating Water:
- Begin adding water in a steady stream while the blender is on low speed. The goal is to achieve a final volume of 500ml for the solution.
- Monitor the level closely to prevent overfilling.
Final Blending:
- Once all the ingredients are combined, blend the mixture on high for about 10 seconds. This ensures that all the ingredients are perfectly integrated and the mixture is smooth.
Preparing the Rice Mixture:
- In a clean quart jar, measure out 35g of rice. It’s recommended to use a funnel to prevent spilling.
- Slowly pour in 50 to 60ml of the egg solution you just prepared. Tilt the jar slightly as you pour to ensure even distribution of the liquid over the rice.
- A frothy foam may form on the top of the mixture. It’s crucial to note that when measuring out the solution, the foam should not be included in the measurement.
- PLEASE NOTE: If you followed our recipe (shown above) you shouldn’t have to worry about this however, ensure you leave about a 1-inch gap at the top to facilitate room for expansion and air exchange.
- Securing Lids: When placing the lid, ensure the rubber seal faces upward. This helps prevent the jars from getting vacuum-sealed during the sterilization process. Another option is to use a mycology lid such as one that contains a filtered vent and/or injection port (we have articles, DIY Supplies, and both Free & Paid for Mycology Courses hosted on our 🍄 Mushroom Academy!
- Foil Cover: Wrap the tops of the jars with aluminum foil. This provides an added layer of protection against potential moisture intrusion during pressure cooking.
Pressure Cooking:
- Seal the quart jar with its lid, ensuring it’s not too tight. This allows for pressure equalization during the cooking process.
- Place the jar in a pressure cooker and set it to 15 PSI. Cook for a full hour. The prolonged cooking ensures complete sterilization, reducing the chances of contamination.
- After 60-Minutes @ 15 PSI, turn off the pressure cooker and allow it to cool naturally. This gradual cooling further aids in sterilization.
Cooling & Inoculation:
- Let cool and use the following day.
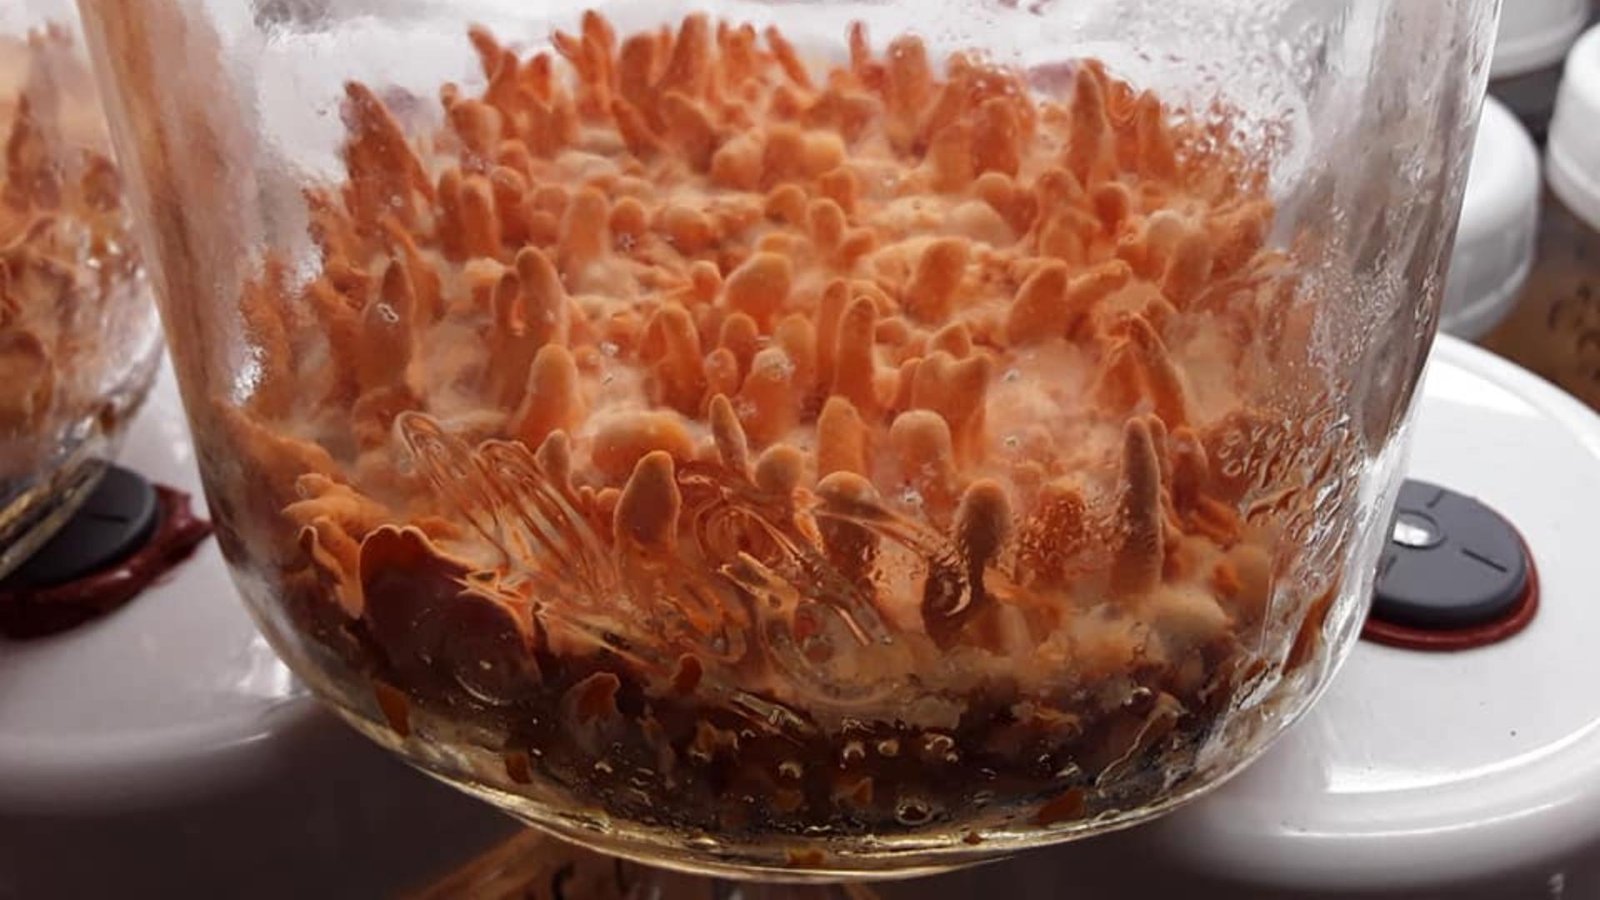
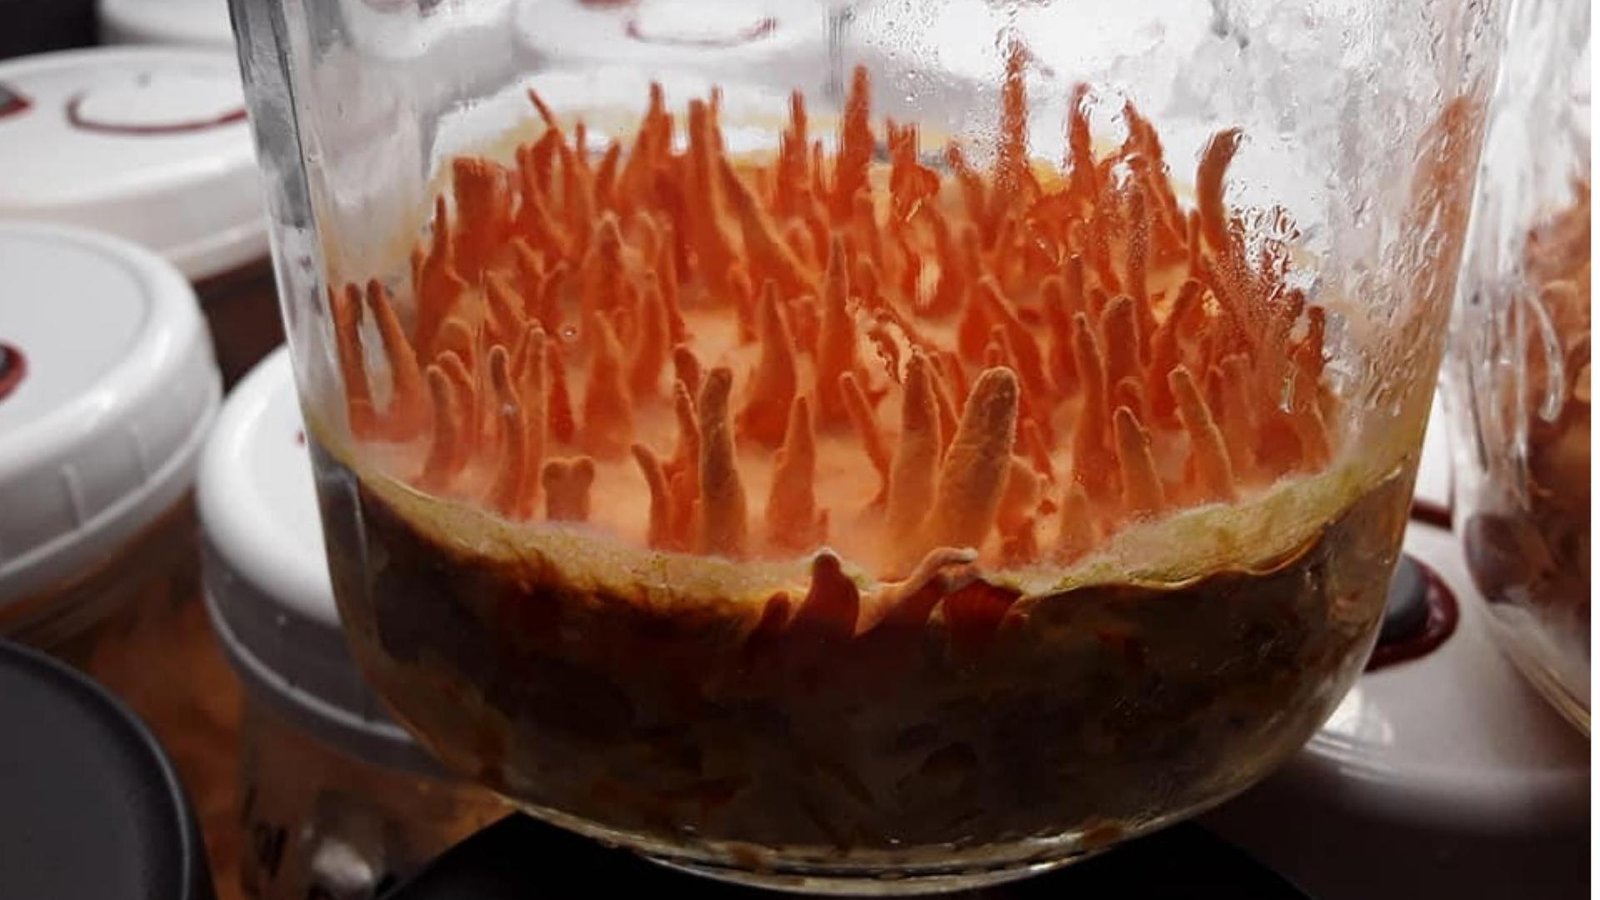
- Post-pressure cooking, the substrate’s appearance might be less than pleasing, with a dense cake-like texture. However, don’t be alarmed. Cordyceps and various other fungal species have shown to thrive and grow rapidly in this enriched environment.
Remember, each step is integral to the success of your mycological endeavors. The universe of mushrooms is expansive, each variant bearing its own unique charm and characteristics. The Marketplace on the 🍄 Mushroom Network is a testament to this diversity. It is a haven for those seeking a deeper understanding of the magical world of mushrooms. If you’re keen on learning more about this type of mushroom and other mushroom variants, this Marketplace is your ultimate resource.
No posts found!
ADDITIONAL INSIGHTS & TIPS:
Eggshell Benefits: The inclusion of eggshells in the recipe provides the fungi with essential calcium. This mineral aids in cell wall structure and strength, fostering robust fungal growth.
Consistency Matters: The mixture’s consistency is crucial. Ensure it’s neither too runny nor too thick, resembling a thin pancake batter. This optimal consistency allows for efficient mycelium colonization.
Avoid Overfilling Jars: While it’s tempting to use all the mixture, overfilling jars can cause uneven cooking and potential contamination. Always stick to the recommended amounts for optimal results.
Sterilize Everything: Even minor contaminants can jeopardize your entire cultivation. Before starting the process, ensure all equipment, including the blender, jars, and even your hands, are thoroughly cleaned and sterilized.
Monitor Pressure Cooker: Make sure the pressure cooker reaches and maintains 15 psi throughout the hour. Fluctuations in pressure can affect sterilization.
Storage: Once the jars have cooled, store them in a cool, dark place to promote mycelium growth. Regularly check for signs of contamination.
Experiment and Refine: This recipe, like all in the world of mycology, is open to innovation. As you gain experience, tweak ingredient proportions or introduce new components to further optimize fungal growth.
Stay Patient: Mycology is as much an art as it is a science. Even with the best recipes and procedures, some batches might not yield expected results. Embrace the learning process and continue to refine your techniques with each attempt.
Feel a tad overwhelmed? Fret not! The 🍄 Mushroom Academy s your companion in this mycological journey. Our curriculum spans from the basics for newcomers to deep dives for the pros. We simplify techniques like the Millet TEK, making them digestible and straightforward. Enroll today, and unlock a world of fungal wisdom, ensuring your growth in both knowledge and yield! Whether you’re a beginner eager to learn or an experienced mycologist looking to broaden your knowledge, the 🍄 Academy has something for everyone.
Related Reads:


Egg TEK for Mycology: A Comprehensive Guide
The world of mycology is expansive, with enthusiasts and experts alike continuously experimenting to derive...
Read More...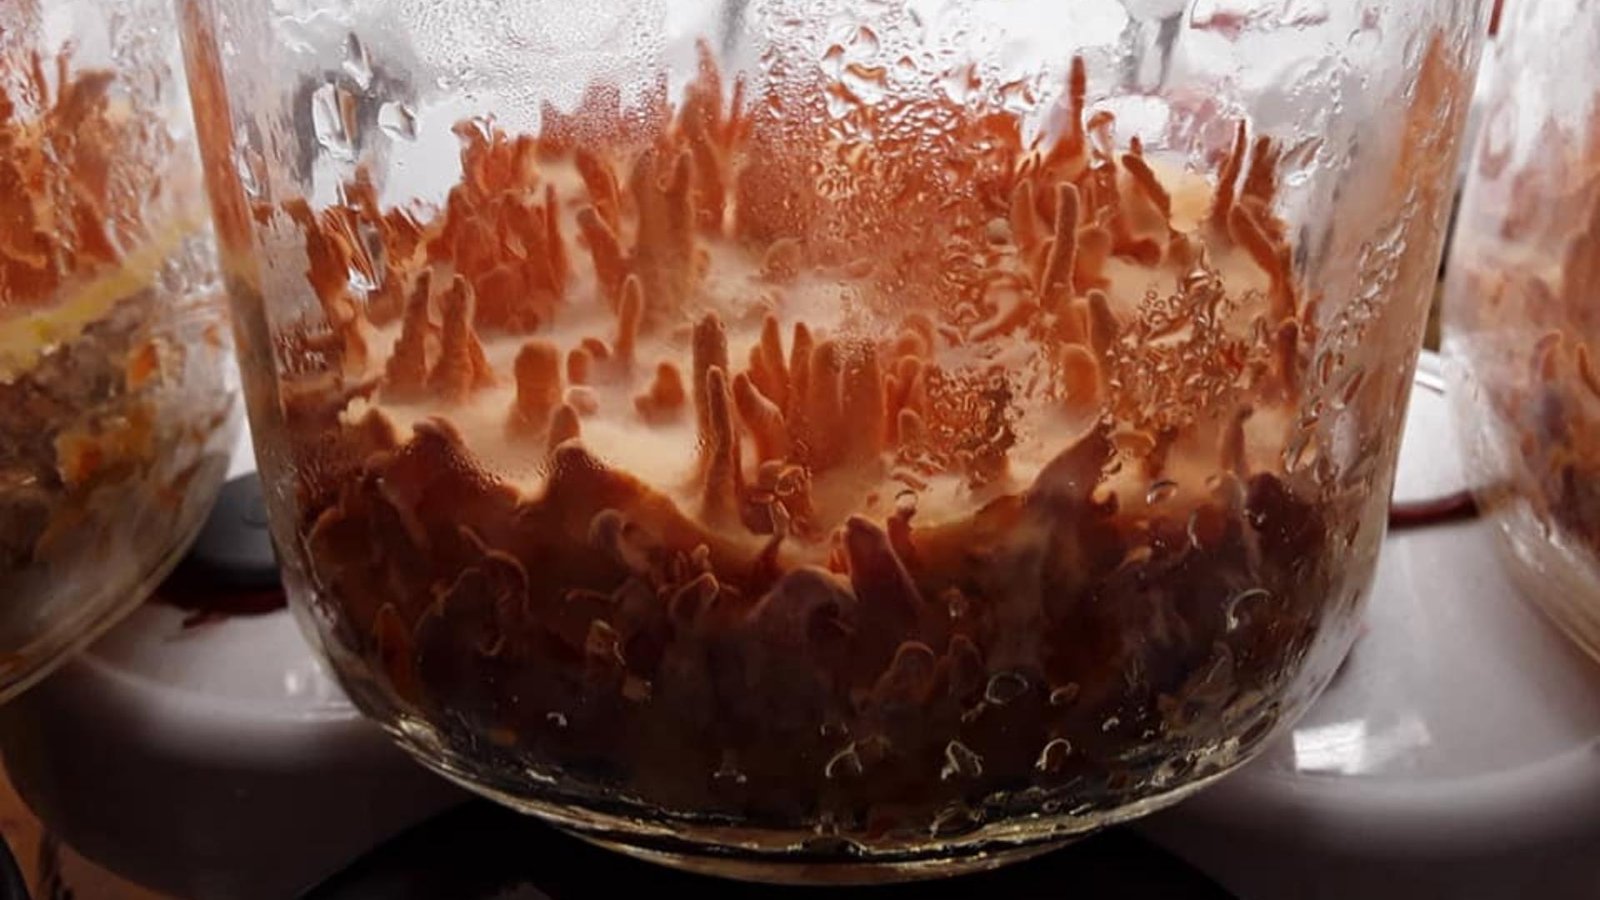
Don’t forget to check out the 🍄 Mushroom Network’s Marketplace to see what’s available. But hurry, our shelves are constantly evolving, and you wouldn’t want to miss out on this wonderful mushroom. Join our growing network of Patrons, Genetics, and Mycologist Vendors only on the 🍄 Mushroom Network!
A CALL TO THE COMMUNITY:
There have been grievances about the lack of shared knowledge on this platform. This recipe is an attempt to rectify that. To all those who’ve felt left out, remember that the mycology community thrives on tireless experimentation, with more failures than successes. The collective aim is to better understand the enigmatic nature of fungi, such as Cordyceps Militaris.
Now, it’s your turn. Take this foundational recipe, innovate, and enhance it. Dive into research, read scientific papers, and become an active contributor. Remember, knowledge is most potent when shared. So, let’s progress together and curtail the complaints. Happy cultivating!
Recommended Reads:

Brown Rice Flour (BRF) TEK Guide for Mycology
Dive into the world of mycology with the classic staple: Brown Rice Flour (BRF). Esteemed...
Read More...
In-depth Exploration of Dye Applications in Mycological Agar Cultivation: Focusing on Red Food Coloring and Other Dyes
Mycologists around the globe utilize a spectrum of techniques to study, propagate, and manipulate fungi....
Read More...
Bleeding Fairy Helmet (Mycena Haematopus)
Greetings, fungal aficionados and curious minds! Today, we delve into the enigmatic world of Mycena...
Read More...
Caesar’s Mushroom (Amanita Caesarea)
SCIENTIFIC NAME: (Amanita Caesarea) COMMON NAME(S): Caesar’s Amanita | Royal Amanita | Orange Amanita |...
Read More...Whoa there, Spore Sport! 🍄 Looks like you’re not logged in yet. Don’t you know what you’re missing? MYCO-CREDITS! Imagine all the fungal fun you could have. It’s like finding a Morel in May and not picking it. Tragic, right? Log In or Become a Myco-Patron and start racking up those credits. It’s more rewarding than finding a mushroom in your backyard! 🌟🏡